Herbal Oils For Hair And Skin


The Ultimate Guide to Herbal Oils for Hair and Skin: Ancient Remedies for Modern Beauty
For over eight years, I have worked with healing herbs. I often speak with people about their beauty routines. Many feel tired of the strange chemicals in their products. They want something simpler. Something pure and effective from nature. The secret to healthy hair and skin is not new. It lies in the ancient wisdom of herbal medicine.
This guide will be your trusted resource. I will walk you through the world of herbal oils for hair and skin. We will explore the most powerful plants for beauty. I will explain the science behind how these botanical remedies work. You will learn how to create your own healing oils at home. This practice connects you directly to the power of plants.
I will share my favorite herbs for strong, healthy hair“>strong, healthy hair. We will also cover the best oils for soft, glowing skin“>soft, glowing skin. You will receive my step-by-step guide to making your own infusions“>making your own infusions. This process is a beautiful part of holistic health. It allows you to control exactly what you put on your body.
Using herbal oils is a tradition thousands of years old. Ancient civilizations knew the value of plant medicine. From the Ayurvedic healers of India to the queens of Egypt, people used plants for wellness. They created botanical oils to nourish their bodies. This deep knowledge of natural healing is still powerful today. Let’s explore these time-tested remedies together.
:max_bytes(150000):strip_icc()/GettyImages-1483312313-b922408b64084713be04449e01eabaff.jpg)
Image Credit: www.verywellhealth.com
Gather Your Materials
Making your own herbal oil is a joyful process. It connects you to the plant world. Think of it like cooking a special meal. You need quality ingredients and the right tools. I have learned that preparation is key to success. A little planning makes all the difference. Let’s gather what you need for your DIY herbal infused oils.
First, Choose Your Healing Herbs
The heart of your oil is the herb itself. For oil infusions, I always use dried herbs. Fresh herbs contain water. Water can make your oil spoil quickly. It can even grow mold. Using dried herbs ensures a safe, stable product.
You can start with some simple, effective plants.
- Calendula: This is my go-to for skin soothing. Its bright orange petals are full of
healing herbspower. - Chamomile: It is gentle and calming. Perfect for irritated skin or a relaxing body oil.
- Rosemary: I love using this for hair oils. It supports a healthy scalp.
- Lavender: A wonderful choice for its calming scent. It is great for both skin and relaxation.
Where do you get your herbs? I grow many of mine. You can also buy them from a trusted source. Look for suppliers who sell organic herbs. This ensures they are free from pesticides. Quality matters for your natural remedies.
Next, Select a Carrier Oil
A carrier oil does an important job. It “carries” the herbal properties into your skin. Each oil has its own unique benefits. Your choice depends on your skin type and needs. I recommend starting with one of these.
- Olive Oil: A classic choice in
herbal medicine. It is rich and deeply moisturizing. Great for dry skin and body oils. - Sweet Almond Oil: This oil is light and absorbs well. It works for most skin types. It is full of Vitamin E.
- Jojoba Oil: This is a favorite of mine for face oils. It is very similar to our skin’s natural sebum. It will not clog pores.
- Fractionated Coconut Oil: This oil always stays liquid. It is very light and has a long shelf life. It is excellent for hair and scalp treatments.
There are many carrier oils to explore. Start with one that feels right for you. Your skin will tell you what it likes.
Finally, Get Your Essential Tools
You do not need fancy equipment. Simple kitchen tools work perfectly. Here is what I keep in my home apothecary.
- A clean glass jar with a tight lid. I use Mason jars. Make sure your jar is completely dry.
- Cheesecloth or a fine-mesh strainer. This helps you separate the herbs from the oil.
- A dark glass bottle for storage. Amber or cobalt blue bottles protect your oil. They keep sunlight out. This helps your oil last longer.
- Labels. Always label your creations. Write the herbs used, the oil used, and the date.
Disclaimer: Always do a patch test before using a new herbal oil. Apply a small amount to your inner arm. Wait 24 hours to check for any reaction. Please consult your healthcare provider before trying new herbal remedies. This is especially true if you are pregnant, nursing, or have a medical condition.
Choose Your Method
You have two main paths for making your oil. One path is slow and traditional. The other is much faster. Both methods work well. Your choice depends on your time and needs. I use both in my own practice.
The Folk (Cold Infusion) Method
This method is my favorite. I call it the sun method. It is slow, gentle, and deeply connected to nature. It uses the sun’s warmth to slowly extract the plant’s goodness. This is the best way for delicate flowers. Think of calendula or chamomile. The slow process protects their fragile properties.
This method teaches patience. It reminds me that natural healing takes time. You are creating more than an oil. You are capturing sunlight and plant spirit in a bottle.
Here is how you do it:
- Fill a clean, dry glass jar about halfway with your dried herbs.
- Pour your chosen carrier oil over the herbs.
- Make sure the herbs are completely covered by the oil.
- Seal the jar with a tight lid.
- Place the jar in a warm, sunny window.
- Let it infuse for two to four weeks.
- Gently shake the jar every day. This helps the infusion process.
The Quick (Gentle Heat) Method
Sometimes you need an herbal oil quickly. This method uses gentle heat to speed things up. It can infuse an oil in hours instead of weeks. I use this for tougher plant parts. It works well for roots, barks, or hardy leaves like rosemary. The heat helps break down the plant material. It releases the medicinal compounds faster.
A strong word of caution is needed here. The key is gentle heat. You never want to fry your herbs. Overheating can destroy the healing properties. It can also make your oil go bad.
Follow these steps carefully:
- Place your herbs and oil in a double boiler.
- You can also put them in a jar inside a slow cooker.
- Add a few inches of water around the jar.
- Warm the oil on the lowest possible setting.
- Keep the temperature low, around 100°F (38°C).
- Let it heat for two to eight hours. Do not let it boil.
- Turn off the heat. Let the oil cool down completely before straining.
Both methods will give you a beautiful, effective herbal oil. One connects you to time and tradition. The other gives you a remedy when you need it most. Choose the one that feels right for you.
Disclaimer: This information is for educational use. It is not medical advice. Please talk to a healthcare provider before starting any new herbal remedy.

Image Credit: www.amazon.com
Strain and Store
Your herbal oil has finished infusing. This next part is very important. Proper straining and storage protect your creation. It keeps the oil potent and safe for use. You have captured the plant’s goodness. Now you must preserve it.
Getting Ready to Strain
I always prepare my workspace first. A clean space prevents contamination. You will need a few simple tools.
- A clean, dry glass bowl or large measuring cup.
- A fine-mesh metal strainer.
- A few layers of cheesecloth.
- A funnel for easy pouring.
- Your final storage bottles.
I learned early on to use both a strainer and cheesecloth. The strainer offers support. The cheesecloth catches the smallest herb particles. This gives you a pure, clear oil for your natural skincare routine.
The Art of Straining Your Oil
This process is simple but requires patience. Place the strainer over your clean bowl. Line the strainer with your cheesecloth. Now, slowly pour the oil and herbs into it. Let the oil drip through on its own.
Once most of the oil has drained, it is time to squeeze. This is where the magic happens. Gather the corners of the cheesecloth. Twist it into a tight bundle. Gently squeeze the bundle with your hands. You will release more of the rich, dark oil. This last bit is full of concentrated botanical remedies. Do not rush this step. Every drop is precious.
After straining, I let the oil sit for a few hours. Any tiny sediment will settle at the bottom. You can then carefully pour the clear oil into your storage bottles. Leave the very last bit of sediment behind.
Choosing the Right Home for Your Oil
Storage is key to a long shelf life. Light and air are enemies of fresh oil. They can cause your oil to go bad quickly. This is why I always use dark glass bottles. Amber or cobalt blue bottles are perfect. They block harmful UV light. This protects the delicate compounds from the healing herbs.
Avoid clear glass bottles if possible. Never use plastic containers. Some plastics can leach chemicals into your oil. This would spoil your hard work and your natural healing preparation.
Labeling and Storing for Freshness
I never skip this final, crucial step. A proper label is your best friend. On it, I write three things:
- The name of the herb(s) used.
- The type of
carrier oilused. - The date the oil was made.
This simple act prevents confusion. It also helps you track the oil’s freshness. Store your finished bottles in a cool, dark place. A kitchen cabinet or pantry is ideal. Keep them away from the stove or a sunny windowsill.
Most homemade herbal oils last for about a year. Some carrier oils last longer than others. Always smell your oil before using it. If it smells sharp or like old crayons, it has gone rancid. It is time to make a new batch.
Disclaimer: This information is for educational purposes only. It does not replace professional medical advice. Always consult your healthcare provider before trying new herbal remedies. Perform a patch test before applying any new oil to your skin.
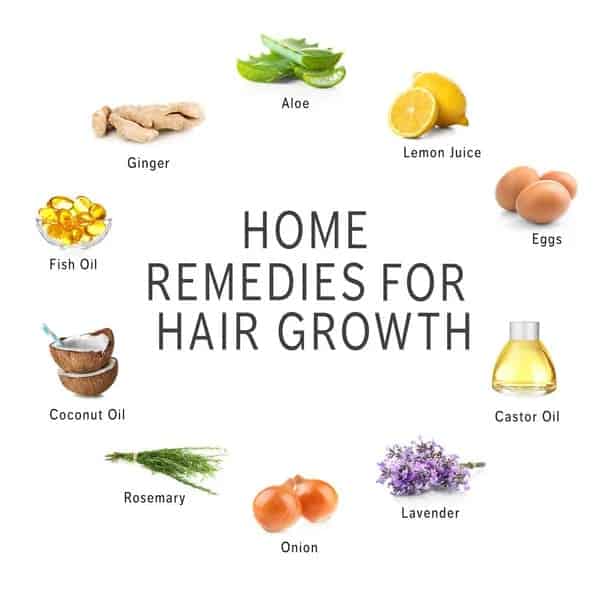
Image Credit: www.harleystreethairtransplant.co.uk
People Also Ask: Your Questions About Herbal Oils Answered
How do I use herbal oils for hair and skin safely?
I always teach my clients to start with a patch test. Apply a tiny amount of oil to your inner arm. Wait 24 hours to check for any irritation or redness. This simple step is your best safety tool. It is also wise to speak with a healthcare provider. This is vital if you are pregnant, nursing, or taking medications. Safe herbal practice always puts your well-being first.
What are the main benefits of herbal oils?
Herbal oils deliver plant nutrients directly to your skin and scalp. They can deeply moisturize dry skin. They can also soothe an itchy, irritated scalp. I have seen how these oils support the body’s own healing abilities. For instance, calendula oil is wonderful for calming inflammation. These botanical remedies are a cornerstone of holistic health. They offer gentle, effective support for your wellness journey.
Are there any side effects from using herbal oils?
Side effects are uncommon but can happen. The most frequent issue is a skin reaction. You might see redness or feel itchy. This is why the patch test is so important. Some herbs can also make your skin more sensitive to the sun. I always recommend you research each herb before use. If you notice any discomfort, stop using the oil immediately.
How long does it take to see results?
Patience is key with natural healing. You may feel immediate softness in your skin or hair. But for deeper goals, like hair growth, results take time. I advise my clients to be consistent for at least four to six weeks. Your body works at its own pace. Think of it like tending a garden. Consistent care helps plants grow strong and healthy over time.
Can I combine herbal oils with my other skincare products?
Yes, you can often add herbal oils to your routine. I suggest applying the oil as the final step. This helps seal in moisture from your other products. Be cautious when using them with strong active ingredients like retinoids. A patch test can show you how they work together. Always listen to your skin. When in doubt, a quick chat with your doctor can provide clarity.
Embrace Plant Power: Your Journey to Natural Beauty Starts Here
I have seen the power of nature in my work. Herbal oils for hair and skin are a wonderful tool. They connect us to ancient plant medicine. Rosemary can help hair feel fuller. Calendula can soothe troubled skin. These are simple gifts from the earth. They support your body’s own natural healing ability.
Your journey into herbal medicine can begin today. You can start with just one herb. Try making a simple oil infusion this weekend. This small step connects you to your personal wellness. It is a beautiful way to care for yourself. The path to natural beauty is a rewarding one.
Always remember to be safe. Do a patch test before using a new oil. This helps check for any skin reactions. These remedies support your health. They do not replace medical advice. Your health is the most important thing.
Disclaimer: The information in this article is for educational purposes only. It is not intended to diagnose, treat, cure, or prevent any disease. Always consult with your healthcare provider or a qualified herbalist before beginning any new herbal remedy, especially if you are pregnant, nursing, have a medical condition, or are taking medication.